 DOM
DOM
一般认为JavaScript由三部分组成
- ECMAScript: 基础语法
- DOM: 文档数据模型
- BOM: 浏览器对象模型
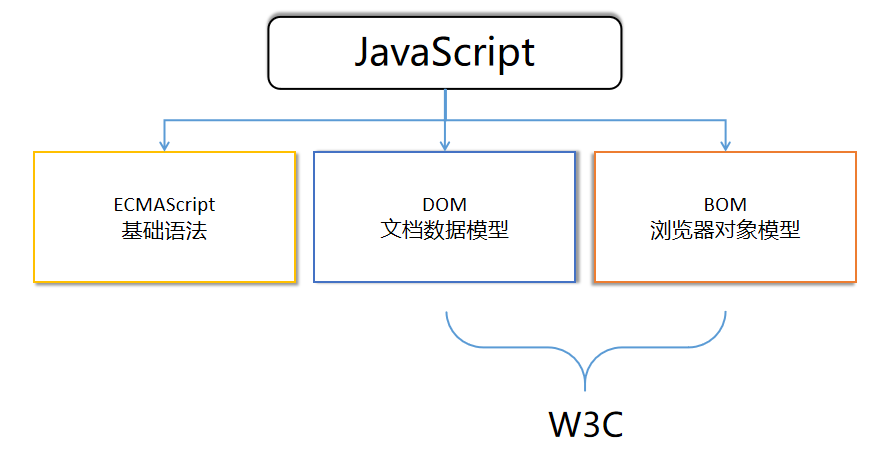
通过面前的学习, 我们了解ECMAScript, 也就JS的基础语法部分, 从这一讲开始, 我们来简单的了解一下DOM和BOM
# 1 什么是DOM
DOM(Document Object Model) 文档对象模型
DOM是W3C组织制定并推荐的标准, 这个标准提供了一系列操作HTML的统一API(Application Programming Interface)
核心对象是document
HTML是一种标记语言, 那么浏览器是如何解析并渲染显示的呢?
浏览器的工作流程
- 浏览器读取HTML文件
- 在内存中生成DOM树
- 调用API渲染显示
# 2 DOM树
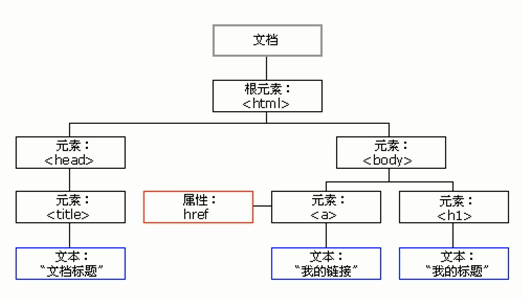
DOM树 是将HTML文档映射成树形结构,通过节点对象对其处理,处理的结果可以加入到当前的页面
- 文档: 一个HTML页面就是一个文档,DOM中使用document表示
- 节点: 网页中的所有内容,在DOM树中都是一个节点(标签、属性、文本、注释等)
- 元素节点: 网页中的所有内容, 比如
h1,div都是一个元素, 也就是element Node - 文本节点:
<h1>文本</h1>里的文本就是文本节点, 也就是text Node - 属性节点:
<img src="1.jpg"></img>里的属性就是属性节点
- 元素节点: 网页中的所有内容, 比如
大家可以通过AST (opens new window)研究
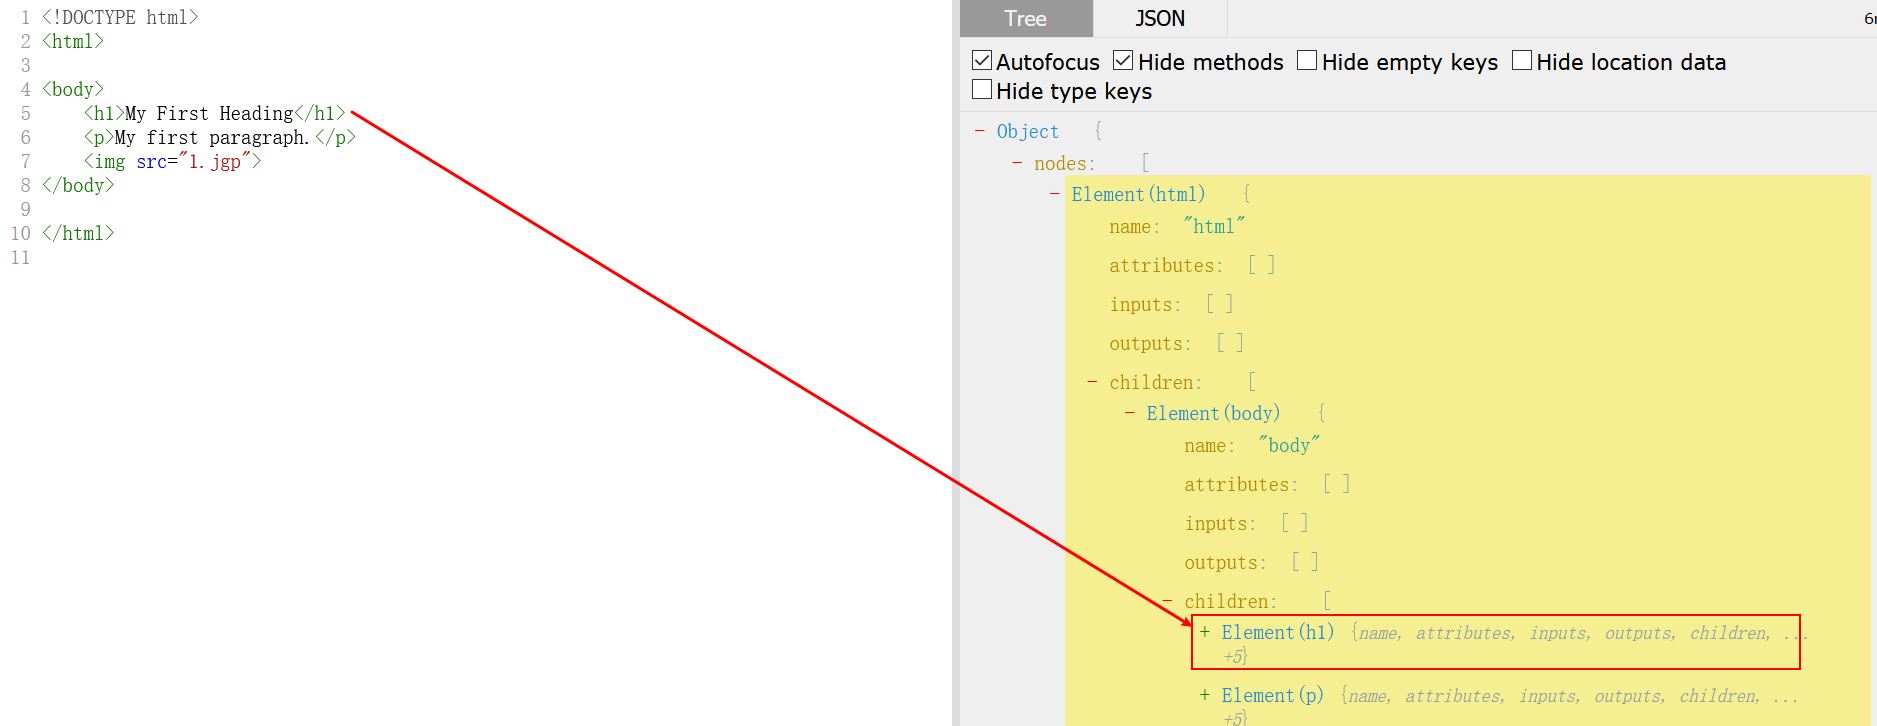
也可以通过chrome打印调试
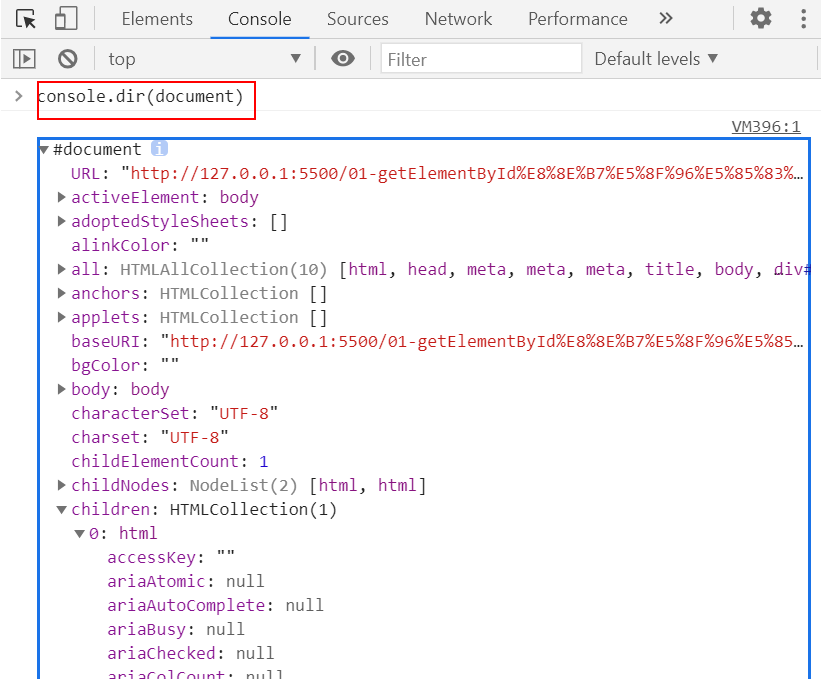
# 3 获取元素
如果要操作DOM, 首先我们需要知道具体需要操作哪一个元素. 即: 获取元素
目前最常用的API
- getElementById(兼容性好)
- querySelect(H5新增, 功能强大)
- querySelectAll(H5新增)
示例一
<!DOCTYPE html>
<html lang="en">
  <head>
    <meta charset="UTF-8" />
    <meta name="viewport" content="width=device-width, initial-scale=1.0" />
    <title>Document</title>
  </head>
  <body>
    <div id="time">2022-02-02</div>
    <script>
      var div = document.getElementById('time')
      console.log(div)
      console.dir(div)
    </script>
  </body>
</html>
1
2
3
4
5
6
7
8
9
10
11
12
13
14
15
16
2
3
4
5
6
7
8
9
10
11
12
13
14
15
16
语法
document.querySelect('选择器')
// 元素选择器, 如: li
// id选择器, 如: #nav
// class选择器, 如: .box
1
2
3
4
2
3
4
示例二
<!DOCTYPE html>
<html lang="en">
  <head>
    <meta charset="UTF-8" />
    <meta name="viewport" content="width=device-width, initial-scale=1.0" />
    <meta http-equiv="X-UA-Compatible" content="ie=edge" />
    <title>Document</title>
  </head>

  <body>
    <div class="box">盒子1</div>
    <div class="box">盒子2</div>
    <div id="nav">
      <ul>
        <li>首页</li>
        <li>产品</li>
      </ul>
    </div>
    <script>
      // querySelector 返回指定选择器的第一个元素对象
      var firstBox = document.querySelector('.box')
      console.log(firstBox)
      var nav = document.querySelector('#nav')
      console.log(nav)
      var li = document.querySelector('li')
      console.log(li)
      // querySelectorAll()返回指定选择器的所有元素对象集合
      var allBox = document.querySelectorAll('.box')
      console.log(allBox)
      var lis = document.querySelectorAll('li')
      console.log(lis)
    </script>
  </body>
</html>
1
2
3
4
5
6
7
8
9
10
11
12
13
14
15
16
17
18
19
20
21
22
23
24
25
26
27
28
29
30
31
32
33
34
35
2
3
4
5
6
7
8
9
10
11
12
13
14
15
16
17
18
19
20
21
22
23
24
25
26
27
28
29
30
31
32
33
34
35
作业
获取到第二个li元素(<li>产品</li>)
# 4 事件驱动
# 1) 什么是事件驱动
我们说JavaScript采用的是事件驱动机制, 即: 触发---响应机制
如何理解
触发一个特定的事件, 比如: 点击一个按钮. 然后会执行事件对应的函数
示例
<!DOCTYPE html>
<html lang="en">
  <head>
    <meta charset="UTF-8" />
    <meta name="viewport" content="width=device-width, initial-scale=1.0" />
    <meta http-equiv="X-UA-Compatible" content="ie=edge" />
    <title>Document</title>
  </head>

  <body>
    <button id="btn">唐伯虎</button>
    <script>
      var btn = document.getElementById('btn')
			// 这个函数只有当按钮被点击时, 才会被执行
      btn.onclick = function () {
        alert('点秋香')
      }
    </script>
  </body>
</html>
1
2
3
4
5
6
7
8
9
10
11
12
13
14
15
16
17
18
19
20
21
2
3
4
5
6
7
8
9
10
11
12
13
14
15
16
17
18
19
20
21
步骤
- 获取元素
- 注册事件(绑定事件)处理函数
- 触发事件, 执行函数
# 2) 鼠标事件
| 事件名 | 触发条件 |
|---|---|
| onclick | 鼠标单点 |
| onblur | 失去焦点 |
| onfocus | 获得焦点 |
| onmouseover | 鼠标经过 |
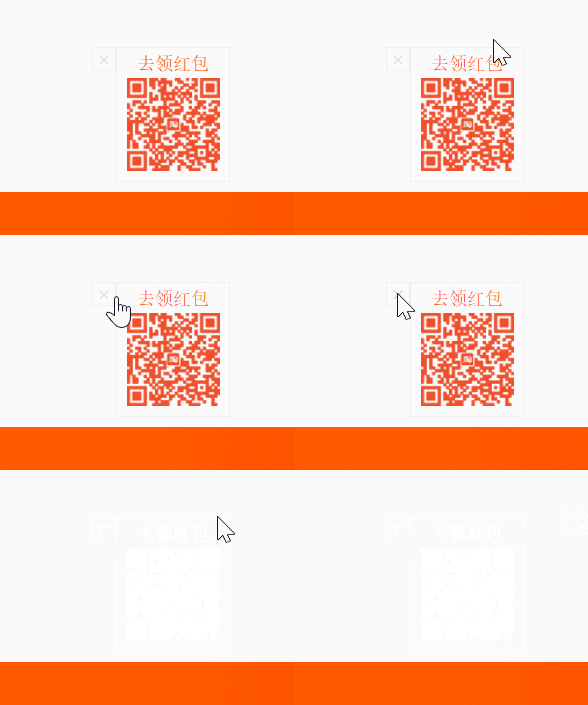
示例 - 仿淘宝隐藏二维码
点击x号, 隐藏广告
<!DOCTYPE html>
<html lang="en">
  <head>
    <meta charset="UTF-8" />
    <meta name="viewport" content="width=device-width, initial-scale=1.0" />
    <title>Document</title>
    <style>
      .box {
        position: relative;
        width: 70px;
        height: 90px;
        margin: 100px auto;
        padding-top: 4px;
        border: 1px solid #ccc;
        font-size: 12px;
        text-align: center;
        color: #ff5000;
      }

      .box img {
        width: 62px;
        margin-top: 4px;
      }

      .box .close_btn {
        position: absolute;
        top: -1px;
        left: -23px;
        width: 20px;
        height: 20px;
        border: 1px solid #ccc;
        font-style: normal;
        color: #ccc;
      }
    </style>
  </head>
  <body>
    <div class="box">
      去领红包
      <img src="images/tao.png" alt="" />
      <i class="close_btn">x</i>
    </div>
    <script>
      // 需求. 仿淘宝的效果. 点击x号, 关闭广告

      // 一. 获取DOM元素
      var box = document.querySelector('.box')
      var btn = document.querySelector('.close_btn')
      // 二. 绑定事件, 修改属性
      btn.onclick = function () {
        // 修改属性
        box.style.display = 'none'
      }
    </script>
  </body>
</html>
1
2
3
4
5
6
7
8
9
10
11
12
13
14
15
16
17
18
19
20
21
22
23
24
25
26
27
28
29
30
31
32
33
34
35
36
37
38
39
40
41
42
43
44
45
46
47
48
49
50
51
52
53
54
55
56
57
2
3
4
5
6
7
8
9
10
11
12
13
14
15
16
17
18
19
20
21
22
23
24
25
26
27
28
29
30
31
32
33
34
35
36
37
38
39
40
41
42
43
44
45
46
47
48
49
50
51
52
53
54
55
56
57
示例 - 仿京东输入框
文本框获得焦点时, 文字颜色变浅, 文本框的内容清空
文本框失去焦点时, 颜色恢复, 文本框为空时, 提示内容

<!DOCTYPE html>
<html lang="en">
  <head>
    <meta charset="UTF-8" />
    <meta name="viewport" content="width=device-width, initial-scale=1.0" />
    <meta http-equiv="X-UA-Compatible" content="ie=edge" />
    <title>Document</title>
    <style>
      input {
        color: #999;
      }
    </style>
  </head>

  <body>
    <input type="text" value="婴幼儿奶粉" />
    <script>
      // 一. 获取dom元素
      var text = document.querySelector('input')
      // 二. 绑定事件
      text.onfocus = function () {
        if (text.value === '婴幼儿奶粉') text.value = ''

        text.style.color = '#333'
      }

      text.onblur = function () {
        if (this.value === '') text.value = '婴幼儿奶粉'
        text.style.color = '#999'
      }
    </script>
  </body>
</html>
1
2
3
4
5
6
7
8
9
10
11
12
13
14
15
16
17
18
19
20
21
22
23
24
25
26
27
28
29
30
31
32
33
34
2
3
4
5
6
7
8
9
10
11
12
13
14
15
16
17
18
19
20
21
22
23
24
25
26
27
28
29
30
31
32
33
34
# 3) 键盘事件
| 事件名 | 触发条件 |
|---|---|
| onkeyup | 按键松开时触发 |
| onkeydown | 按键按下时触发 |
| onkeypress | 按键按下时触发, 不能识别ctrl, shift等功能键, 区分大小写 |
# 4) 新增的事件注册方式
addEventListener()
示例
domObj.addEventListener('click', function() {
  // 回调函数
  alert(22);
})
1
2
3
4
2
3
4
- 在注册事件时不用加on
# 5) 事件对象
示例
domObj.addEventListener('click', function(e) {
  console.dir(e)
})
1
2
3
2
3
比较常用的属性和方法
- e.target: 触发事件的对象
- e.preventDafult(): 阻止默认行为
- e.stopPropagation(): 阻止冒泡
示例 - 判断哪个按键被按下了
<!DOCTYPE html>
<html lang="en">

<head>
    <meta charset="UTF-8">
    <meta name="viewport" content="width=device-width, initial-scale=1.0">
    <meta http-equiv="X-UA-Compatible" content="ie=edge">
    <title>Document</title>
</head>

<body>
    <script>
        // 键盘事件对象中的keyCode属性可以得到相应键的ASCII码值
        // 1. 我们的keyup 和keydown事件不区分字母大小写  a 和 A 得到的都是65
        // 2. 我们的keypress 事件 区分字母大小写  a  97 和 A 得到的是65
        document.addEventListener('keyup', function(e) {
            // console.log(e);
            console.log('up:' + e.keyCode);
            // 我们可以利用keycode返回的ASCII码值来判断用户按下了那个键
            if (e.keyCode === 65) {
                alert('您按下的a键');
            } else {
                alert('您没有按下a键')
            }

        })
        document.addEventListener('keypress', function(e) {
            // console.log(e);
            console.log('press:' + e.keyCode);

        })
    </script>
</body>

</html>
1
2
3
4
5
6
7
8
9
10
11
12
13
14
15
16
17
18
19
20
21
22
23
24
25
26
27
28
29
30
31
32
33
34
35
2
3
4
5
6
7
8
9
10
11
12
13
14
15
16
17
18
19
20
21
22
23
24
25
26
27
28
29
30
31
32
33
34
35
示例 - this和e.target的区别
<!DOCTYPE html>
<html lang="en">
  <head>
    <meta charset="UTF-8" />
    <meta name="viewport" content="width=device-width, initial-scale=1.0" />
    <meta http-equiv="X-UA-Compatible" content="ie=edge" />
    <title>Document</title>
  </head>

  <body>
    <ul>
      <li>1</li>
      <li>2</li>
      <li>3</li>
    </ul>
    <script>
      var ul = document.querySelector('ul')
      ul.addEventListener('click', function (e) {
        // 我们给ul 绑定了事件  那么this 就指向ul
        console.log(this)
        // 如果是li 触发了事件 会向上冒泡, e.target表示li
        console.log(e.target)
      })
    </script>
  </body>
</html>
1
2
3
4
5
6
7
8
9
10
11
12
13
14
15
16
17
18
19
20
21
22
23
24
25
26
27
2
3
4
5
6
7
8
9
10
11
12
13
14
15
16
17
18
19
20
21
22
23
24
25
26
27
# 5 自学API
- 结点操作相关的API(增删改查)
- 结点关系相关的API(父子兄弟)
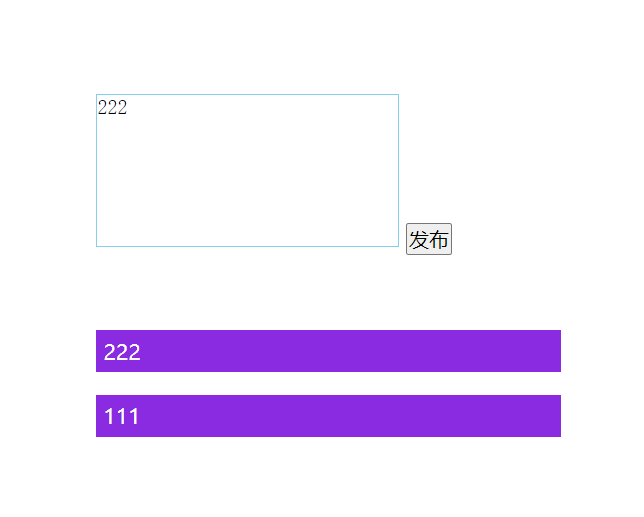
练习: 实现一个留言板
要求
- 当输入内容为空时, 提示"请输入内容"
- 每次发布的留言在最上面显示
- 发布完后, 清除之前写的内容
答案
<!DOCTYPE html>
<html lang="en">
  <head>
    <meta charset="UTF-8" />
    <meta name="viewport" content="width=device-width, initial-scale=1.0" />
    <meta http-equiv="X-UA-Compatible" content="ie=edge" />
    <title>Document</title>
    <style>
      * {
        margin: 0;
        padding: 0;
      }

      body {
        padding: 100px;
      }

      textarea {
        width: 200px;
        height: 100px;
        border: 1px solid skyblue;
        outline: none;
        resize: none;
      }

      ul {
        margin-top: 50px;
      }

      li {
        width: 300px;
        margin: 15px 0;
        padding: 5px;
        background-color: blueviolet;
        color: #fff;
      }
    </style>
  </head>

  <body>
    <textarea name="" id=""></textarea>
    <button>发布</button>
    <ul></ul>
    <script>
      // 1. 获取元素
      var btn = document.querySelector('button')
      var text = document.querySelector('textarea')
      var ul = document.querySelector('ul')
      // 2. 注册事件
      btn.onclick = function () {
        if (text.value == '') {
          alert('您没有输入内容')
          return false
        } else {
          // (1) 创建元素
          var li = document.createElement('li')
          // 先有li 才能赋值
          li.innerHTML = text.value
          // (2) 添加元素
          ul.insertBefore(li, ul.children[0])
          text.value = ''
        }
      }
    </script>
  </body>
</html>
1
2
3
4
5
6
7
8
9
10
11
12
13
14
15
16
17
18
19
20
21
22
23
24
25
26
27
28
29
30
31
32
33
34
35
36
37
38
39
40
41
42
43
44
45
46
47
48
49
50
51
52
53
54
55
56
57
58
59
60
61
62
63
64
65
66
67
2
3
4
5
6
7
8
9
10
11
12
13
14
15
16
17
18
19
20
21
22
23
24
25
26
27
28
29
30
31
32
33
34
35
36
37
38
39
40
41
42
43
44
45
46
47
48
49
50
51
52
53
54
55
56
57
58
59
60
61
62
63
64
65
66
67
如果觉得有帮助, 可以微信扫码, 请杰哥喝杯咖啡~

上次更新: 2021/09/03, 15:32:17
